Stretch Denim Coord
This fabric is just so me isn’t it, but the fun here is its part of the print on demand service from Minerva.com so I

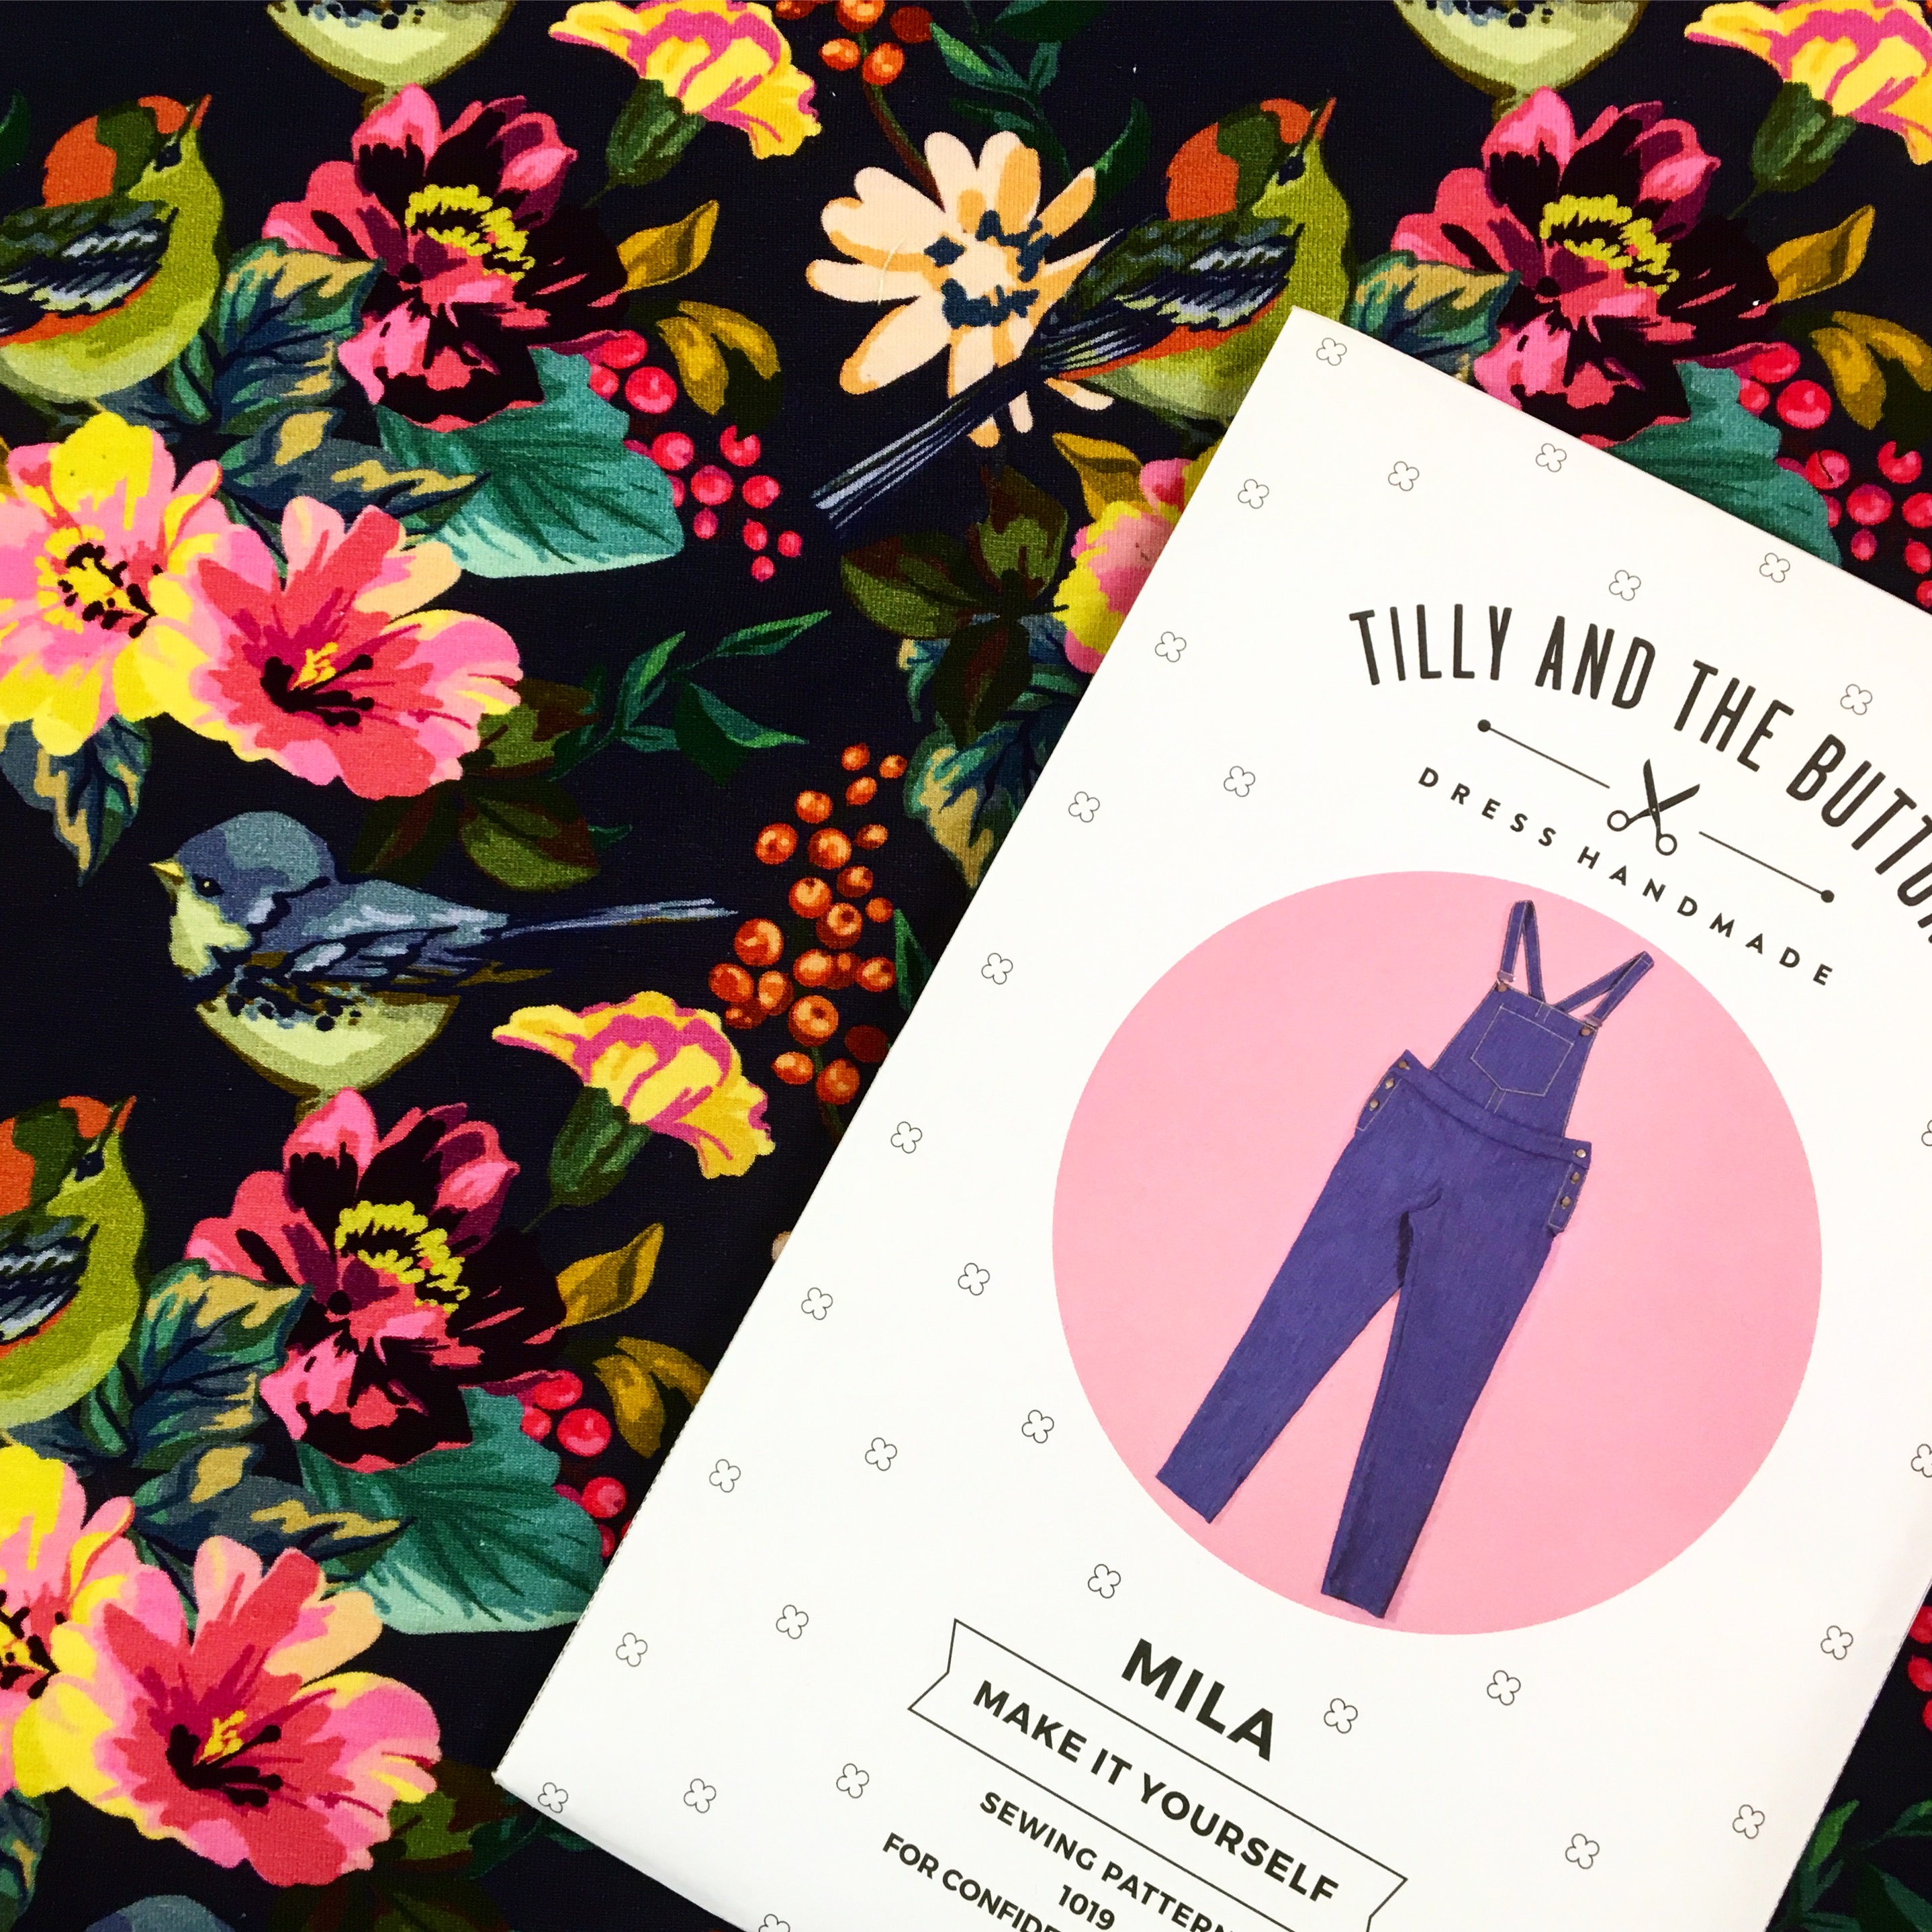
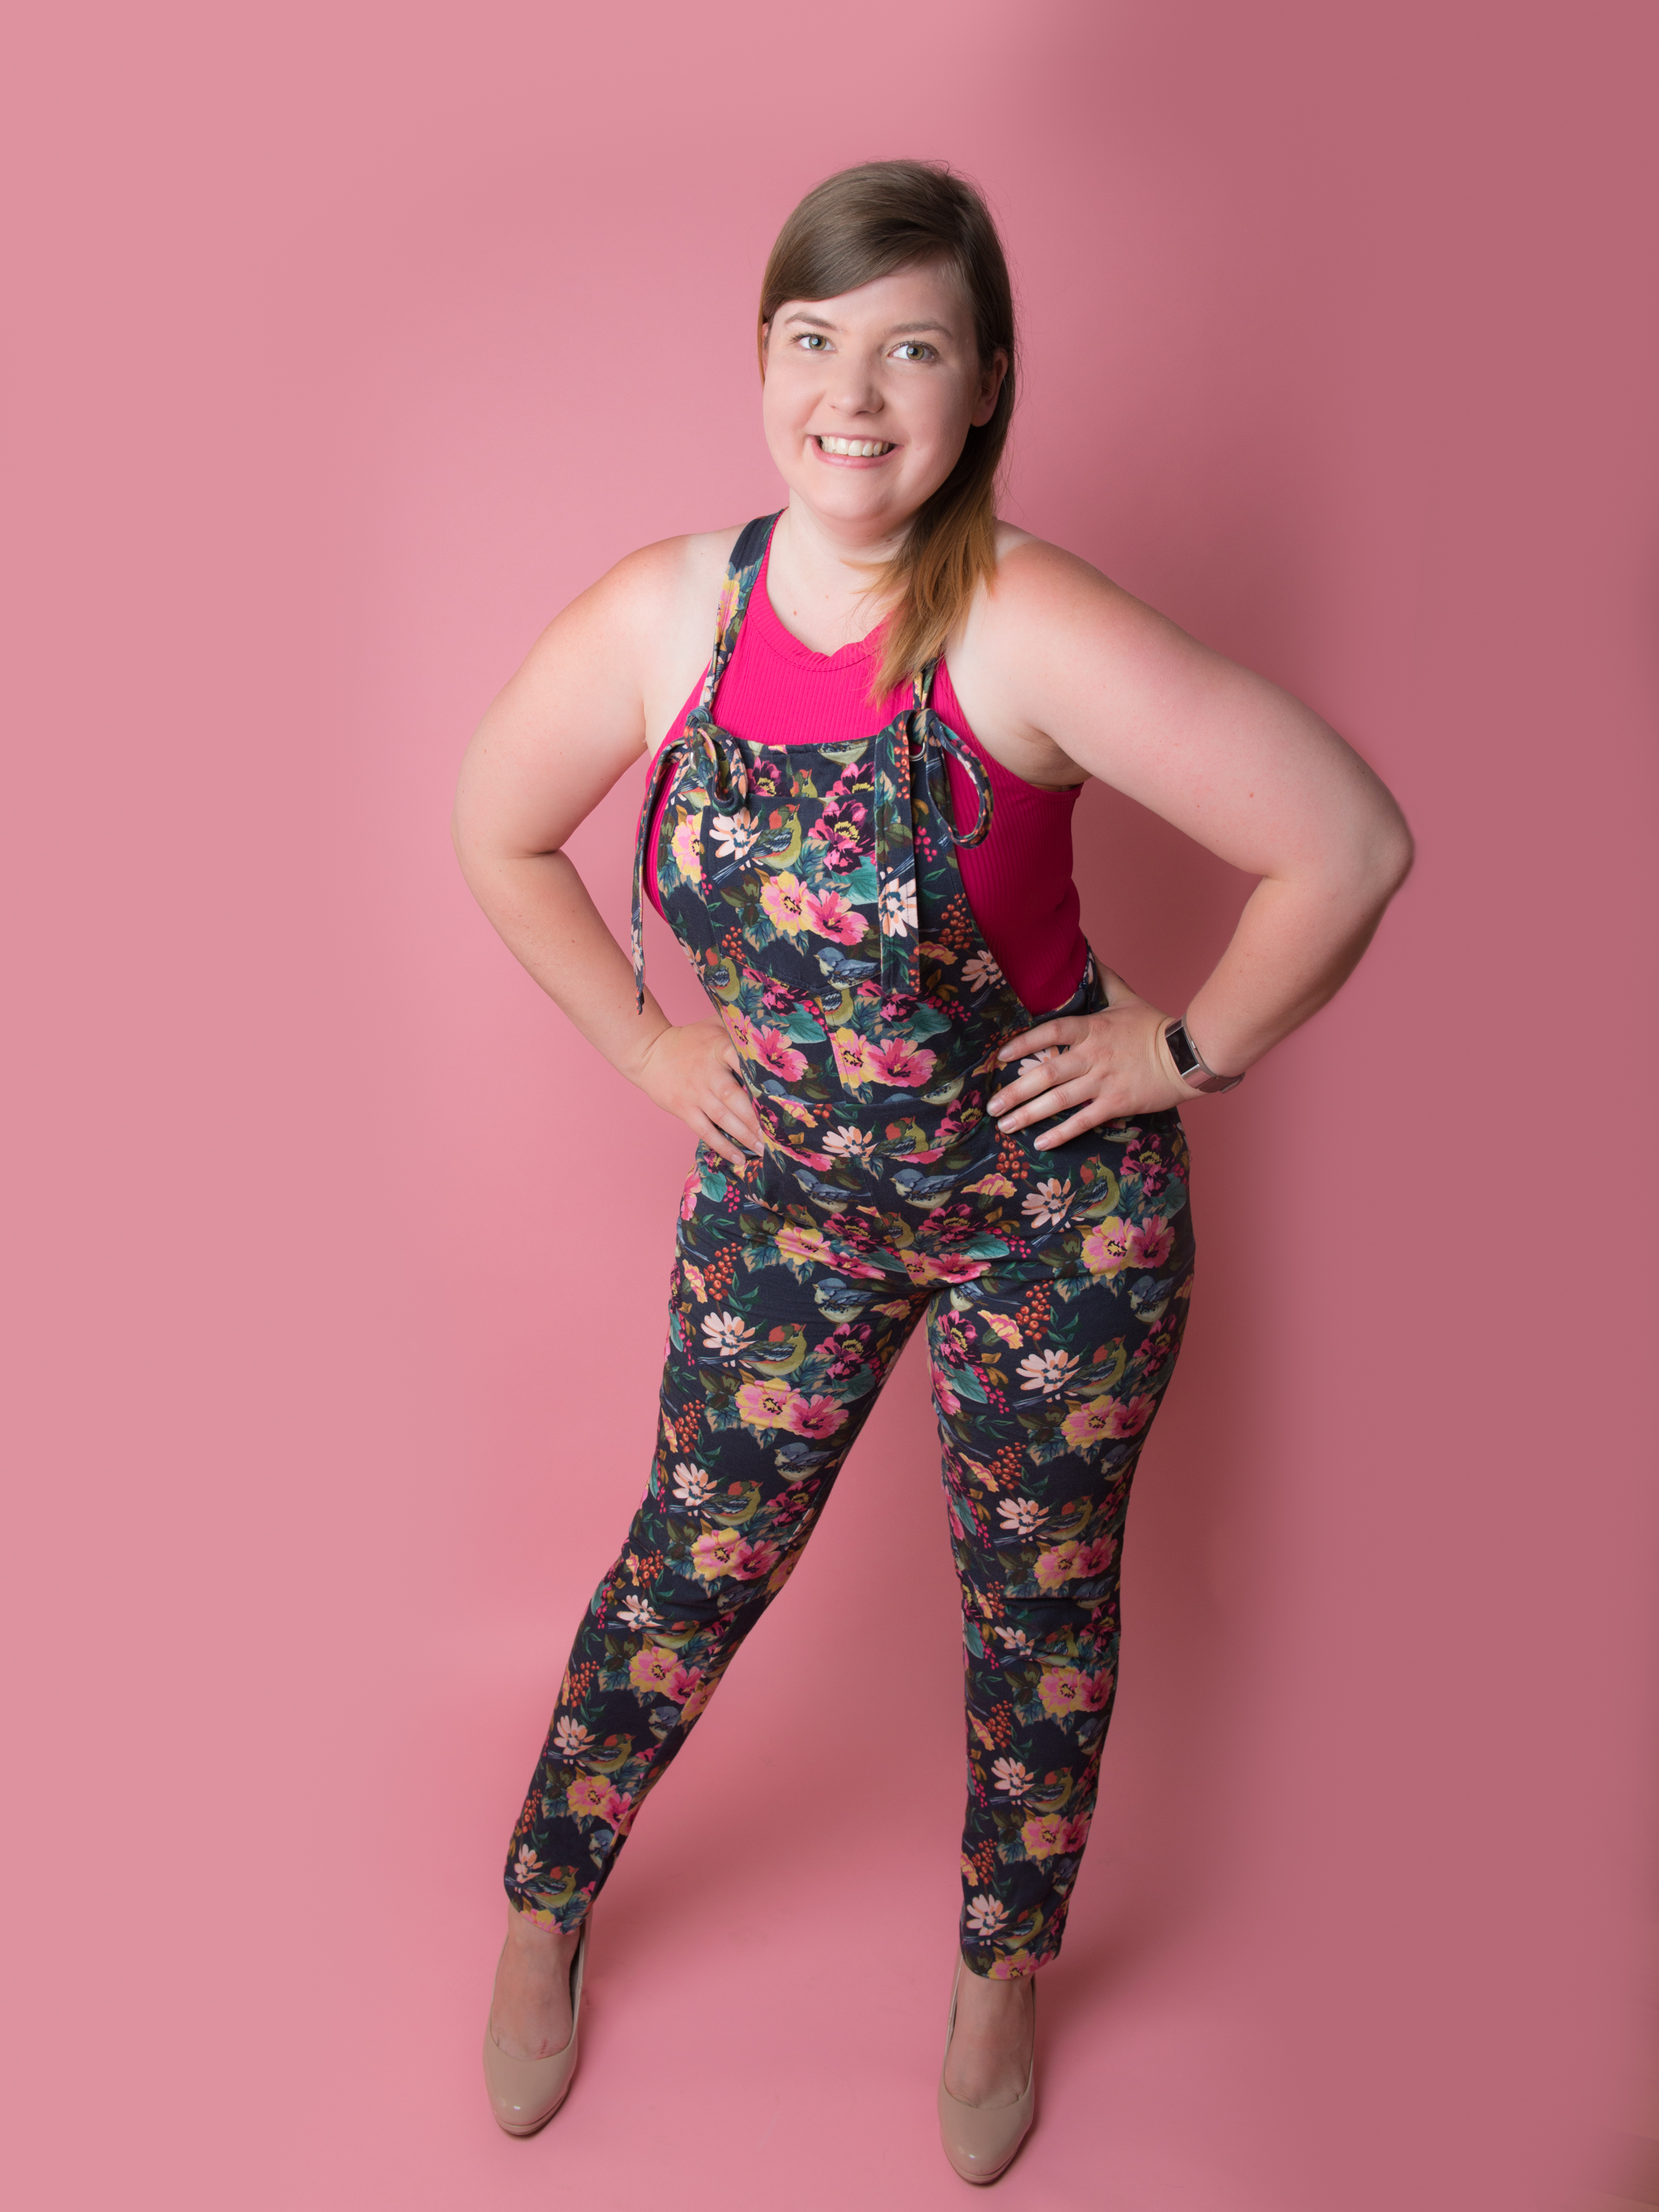
The Tilly and the Buttons Mila Dungarees are a project I’ve been waiting for the right fabric for. The pattern calls for a stretch denim, needlecord or woven cotton, but specifically states that the fabric must contain at least 2% lycra or spandex. If you’ve seen pictures of the Mila dungarees most people seem to have made them from what looks like a heavier weight stretch fabric such as a denim/stretch cotton so I had sort of skirted over the option until recently of making them in a standard jersey fabric.
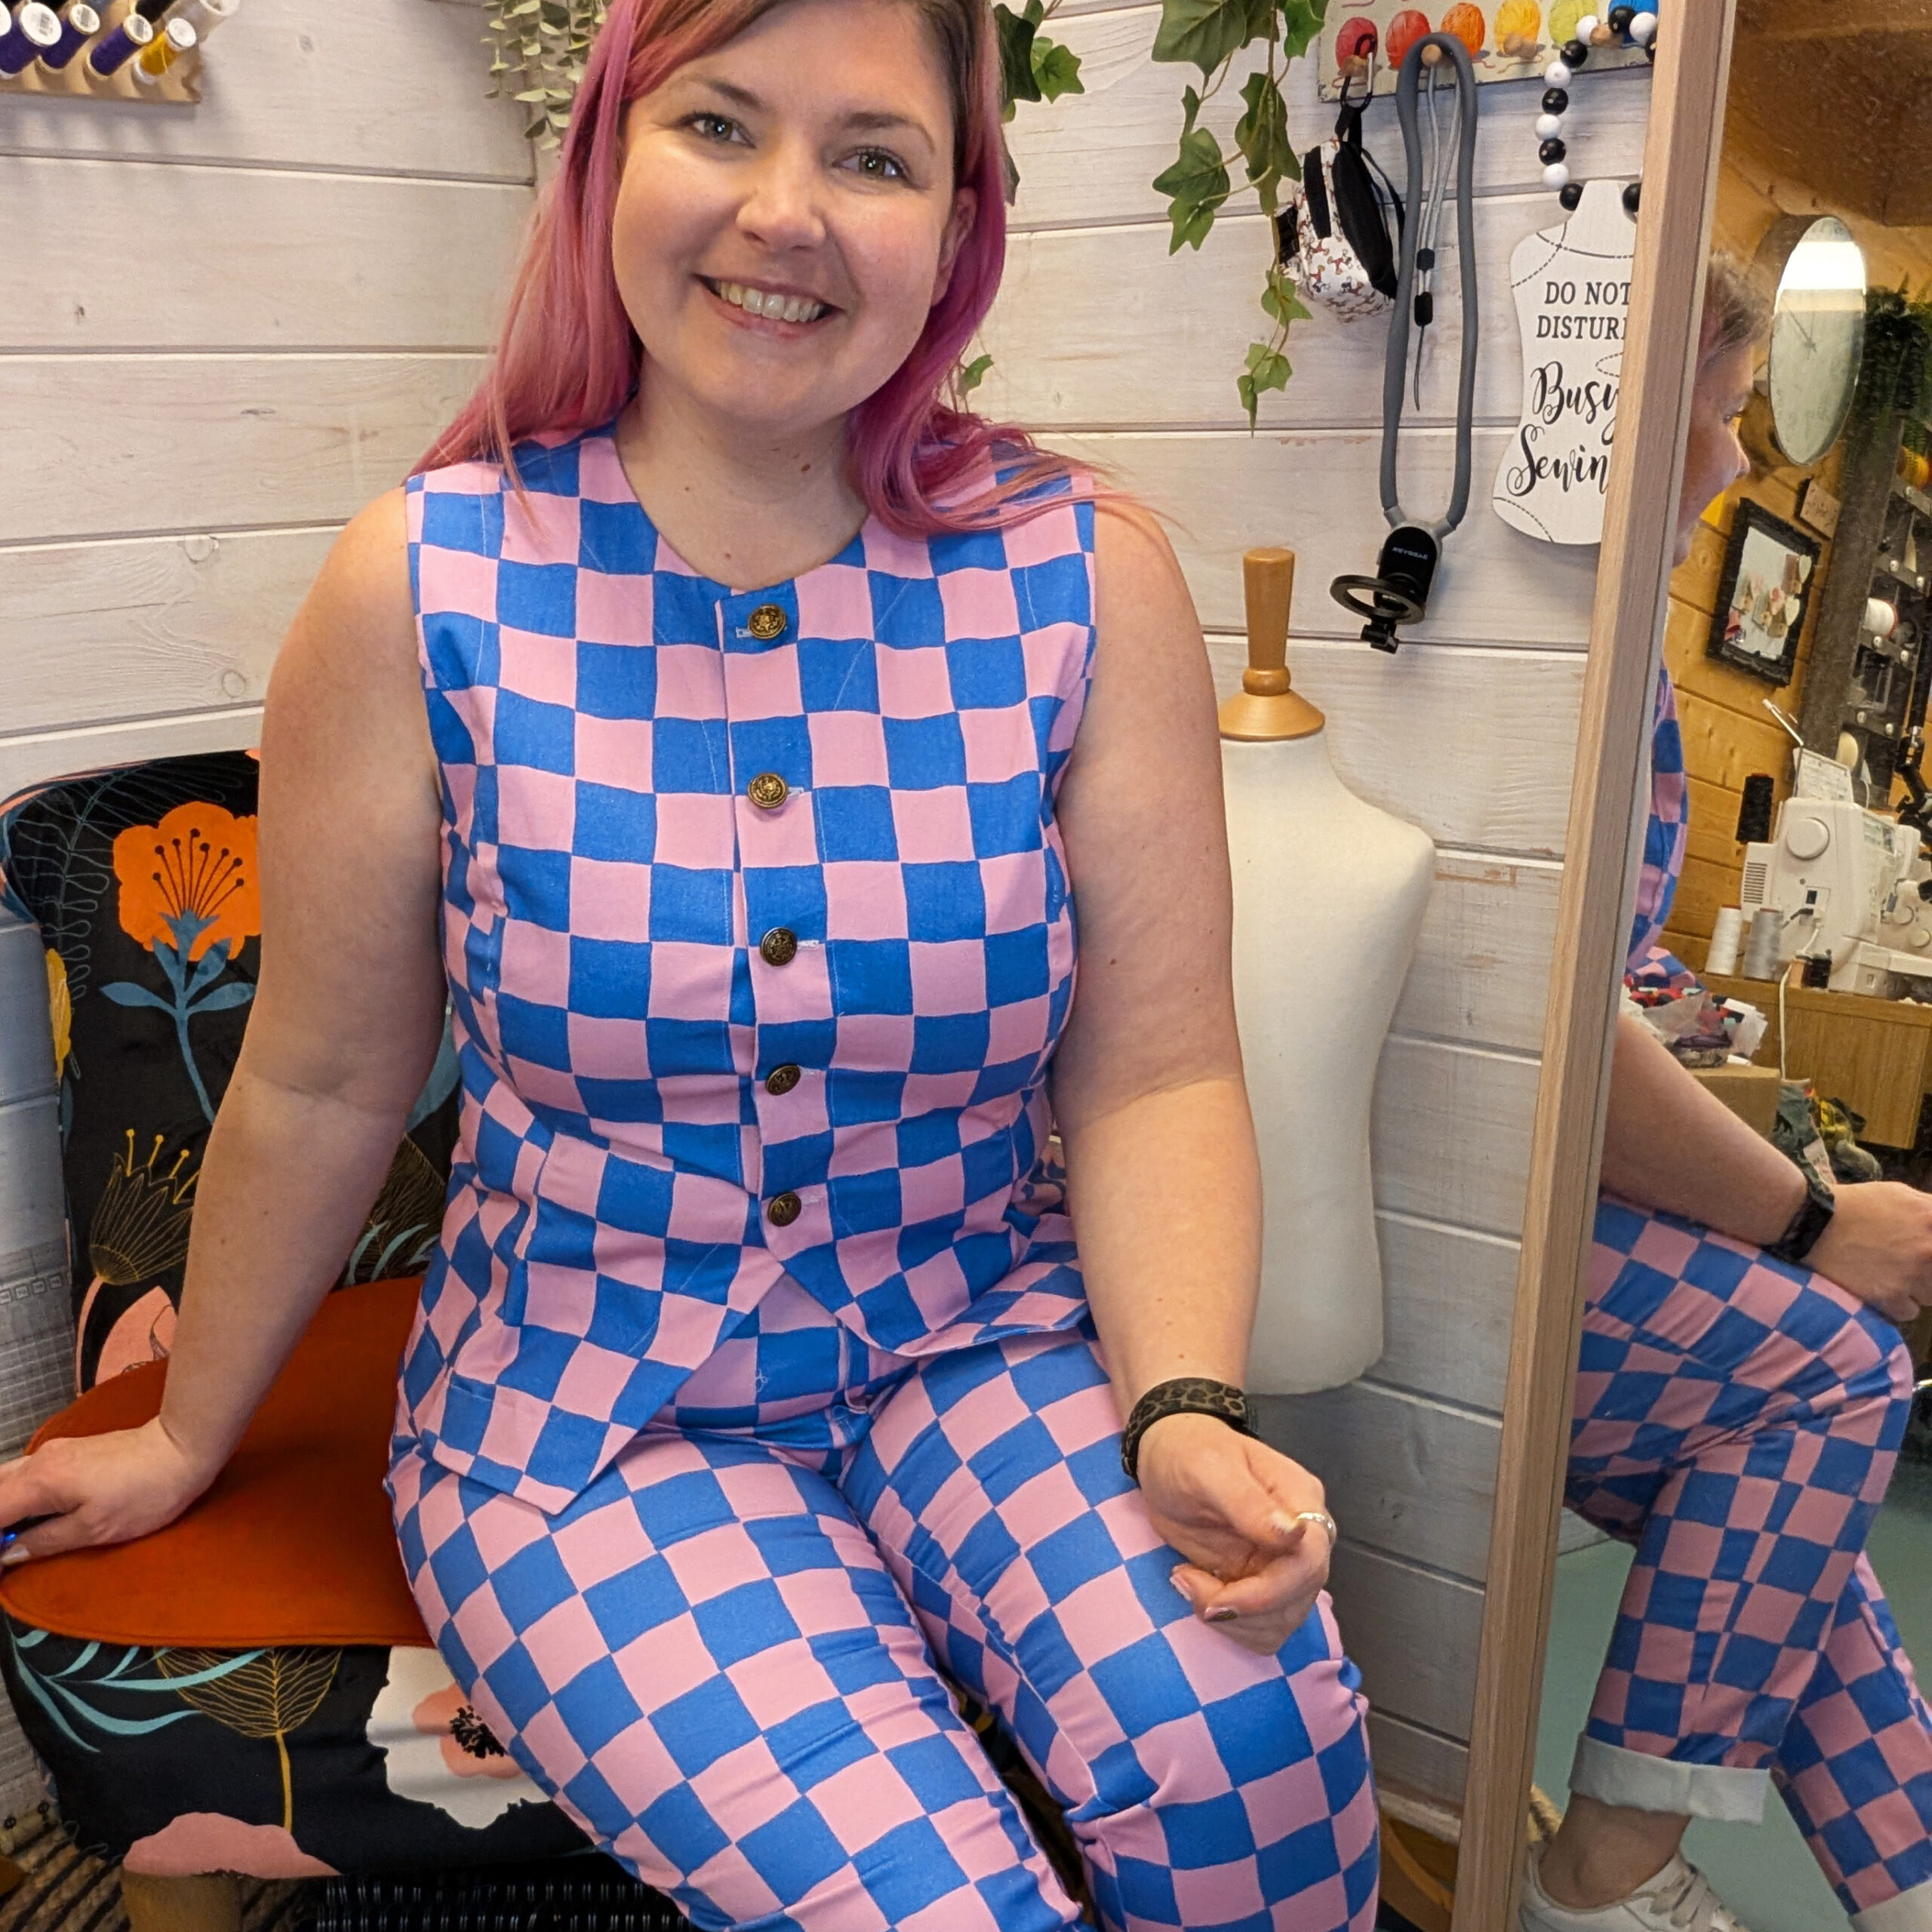
That wasn’t the only rogue choice I made though… I also omitted the button tabs and inserted an invisible zip, used eyelets and longer straps instead of the dungaree fastenings and even inserted a hip pocket (and not the patch pocket option that Tilly has recently released). So if you fancy any of these options read on and I’ll explain how I did it.
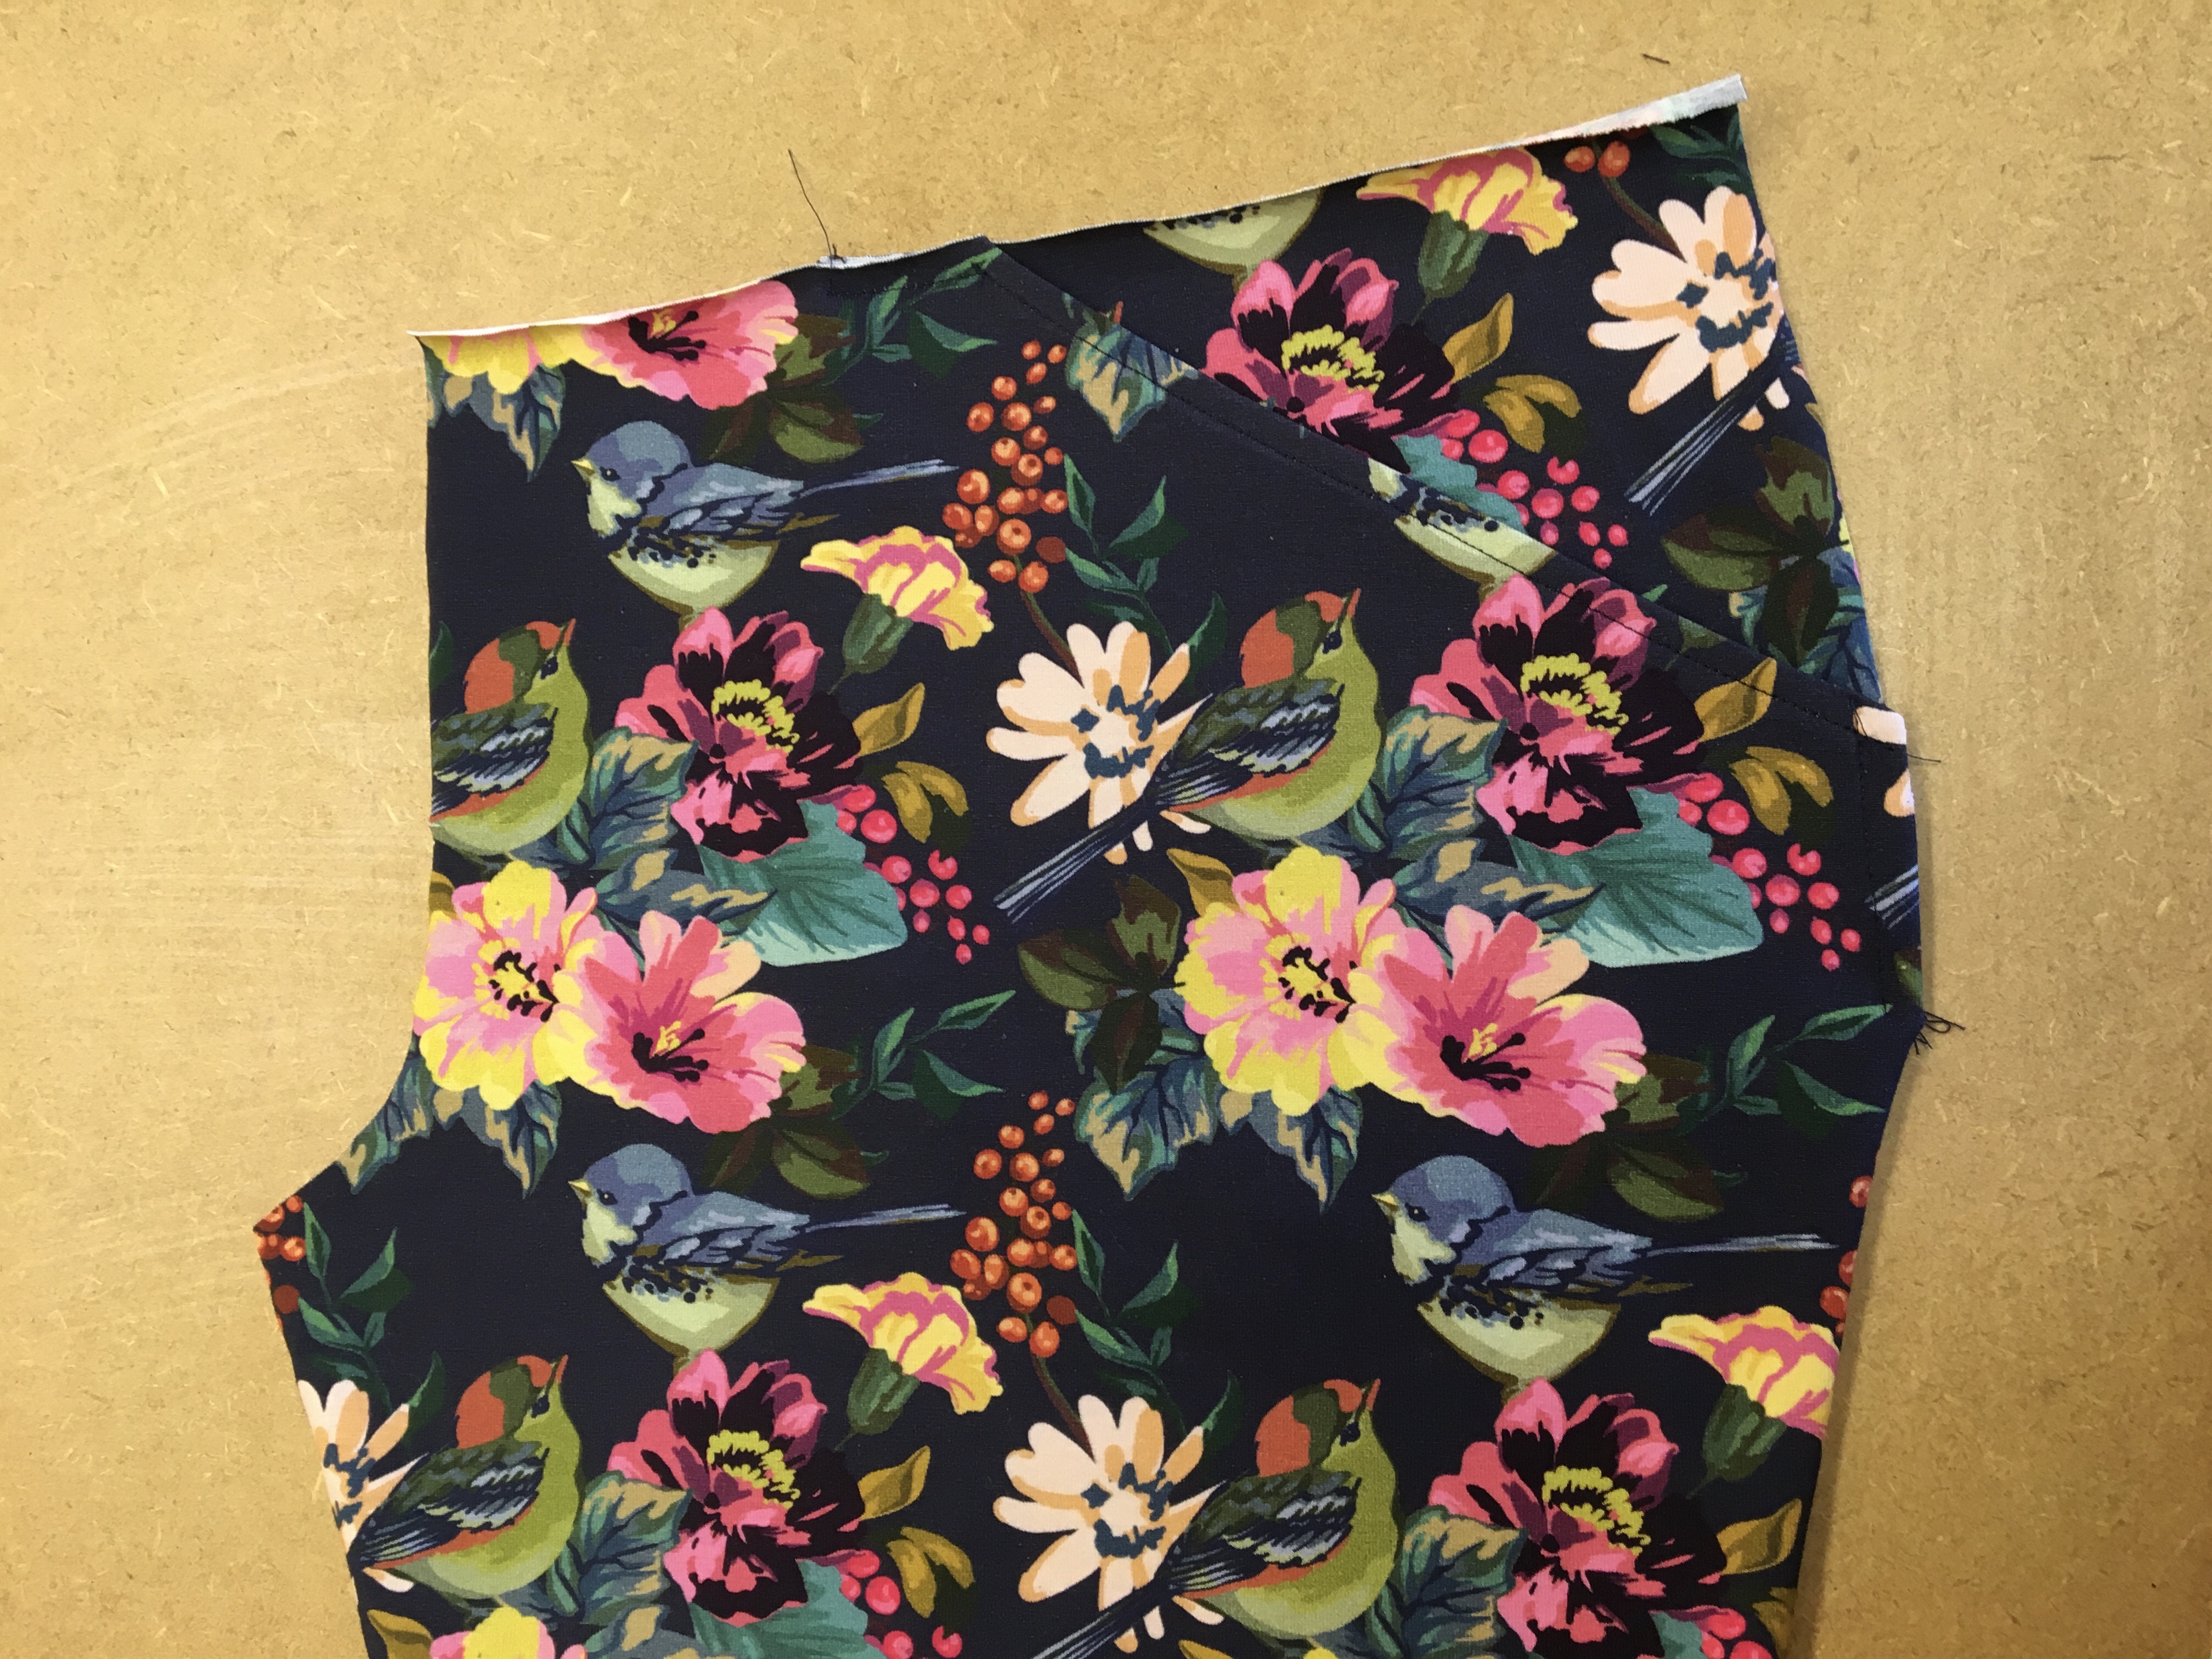
I used 2 meters of fabric (even with all the adaptations I made). I could have worried about pattern matching but with a busy print like this I think you’d be there all day trying to make things line up. In hindsight I should have considered the pattern on the front pocket, I don’t think it necessarily needed to be pattern matched but the placement of it is almost too close to be right (if that makes any sense at all).

I find with all the Tilly patterns that they aren’t quite as fitted as I’d like them on the waist so I always take them in to get them sitting right (this is subjective and depends on your body type). When cutting out any garment you should always pick a size that will fit your largest measurement and take in the others rather than attempting to squeeze a larger part into too small a size.
On this pattern the easiest way to adjust the fit of the waist is to pin one of the side seams on the waist band and then put it in place around your body to see how it fits and adjust the side seams accordingly. If you increased the seam allowance on the side seams by 1cm (for example) you would then need to increase the side seam on the top edge of the legs by the same amount but then taper the stitching in to meet the original sewing line (Doing so in a nice curve so it sits flat against your body). This will mean that now the waistband will fit on the top of the trousers like it should, and that’s it. The top sections don’t go the full width of the waist band so don’t need adjusting at all.
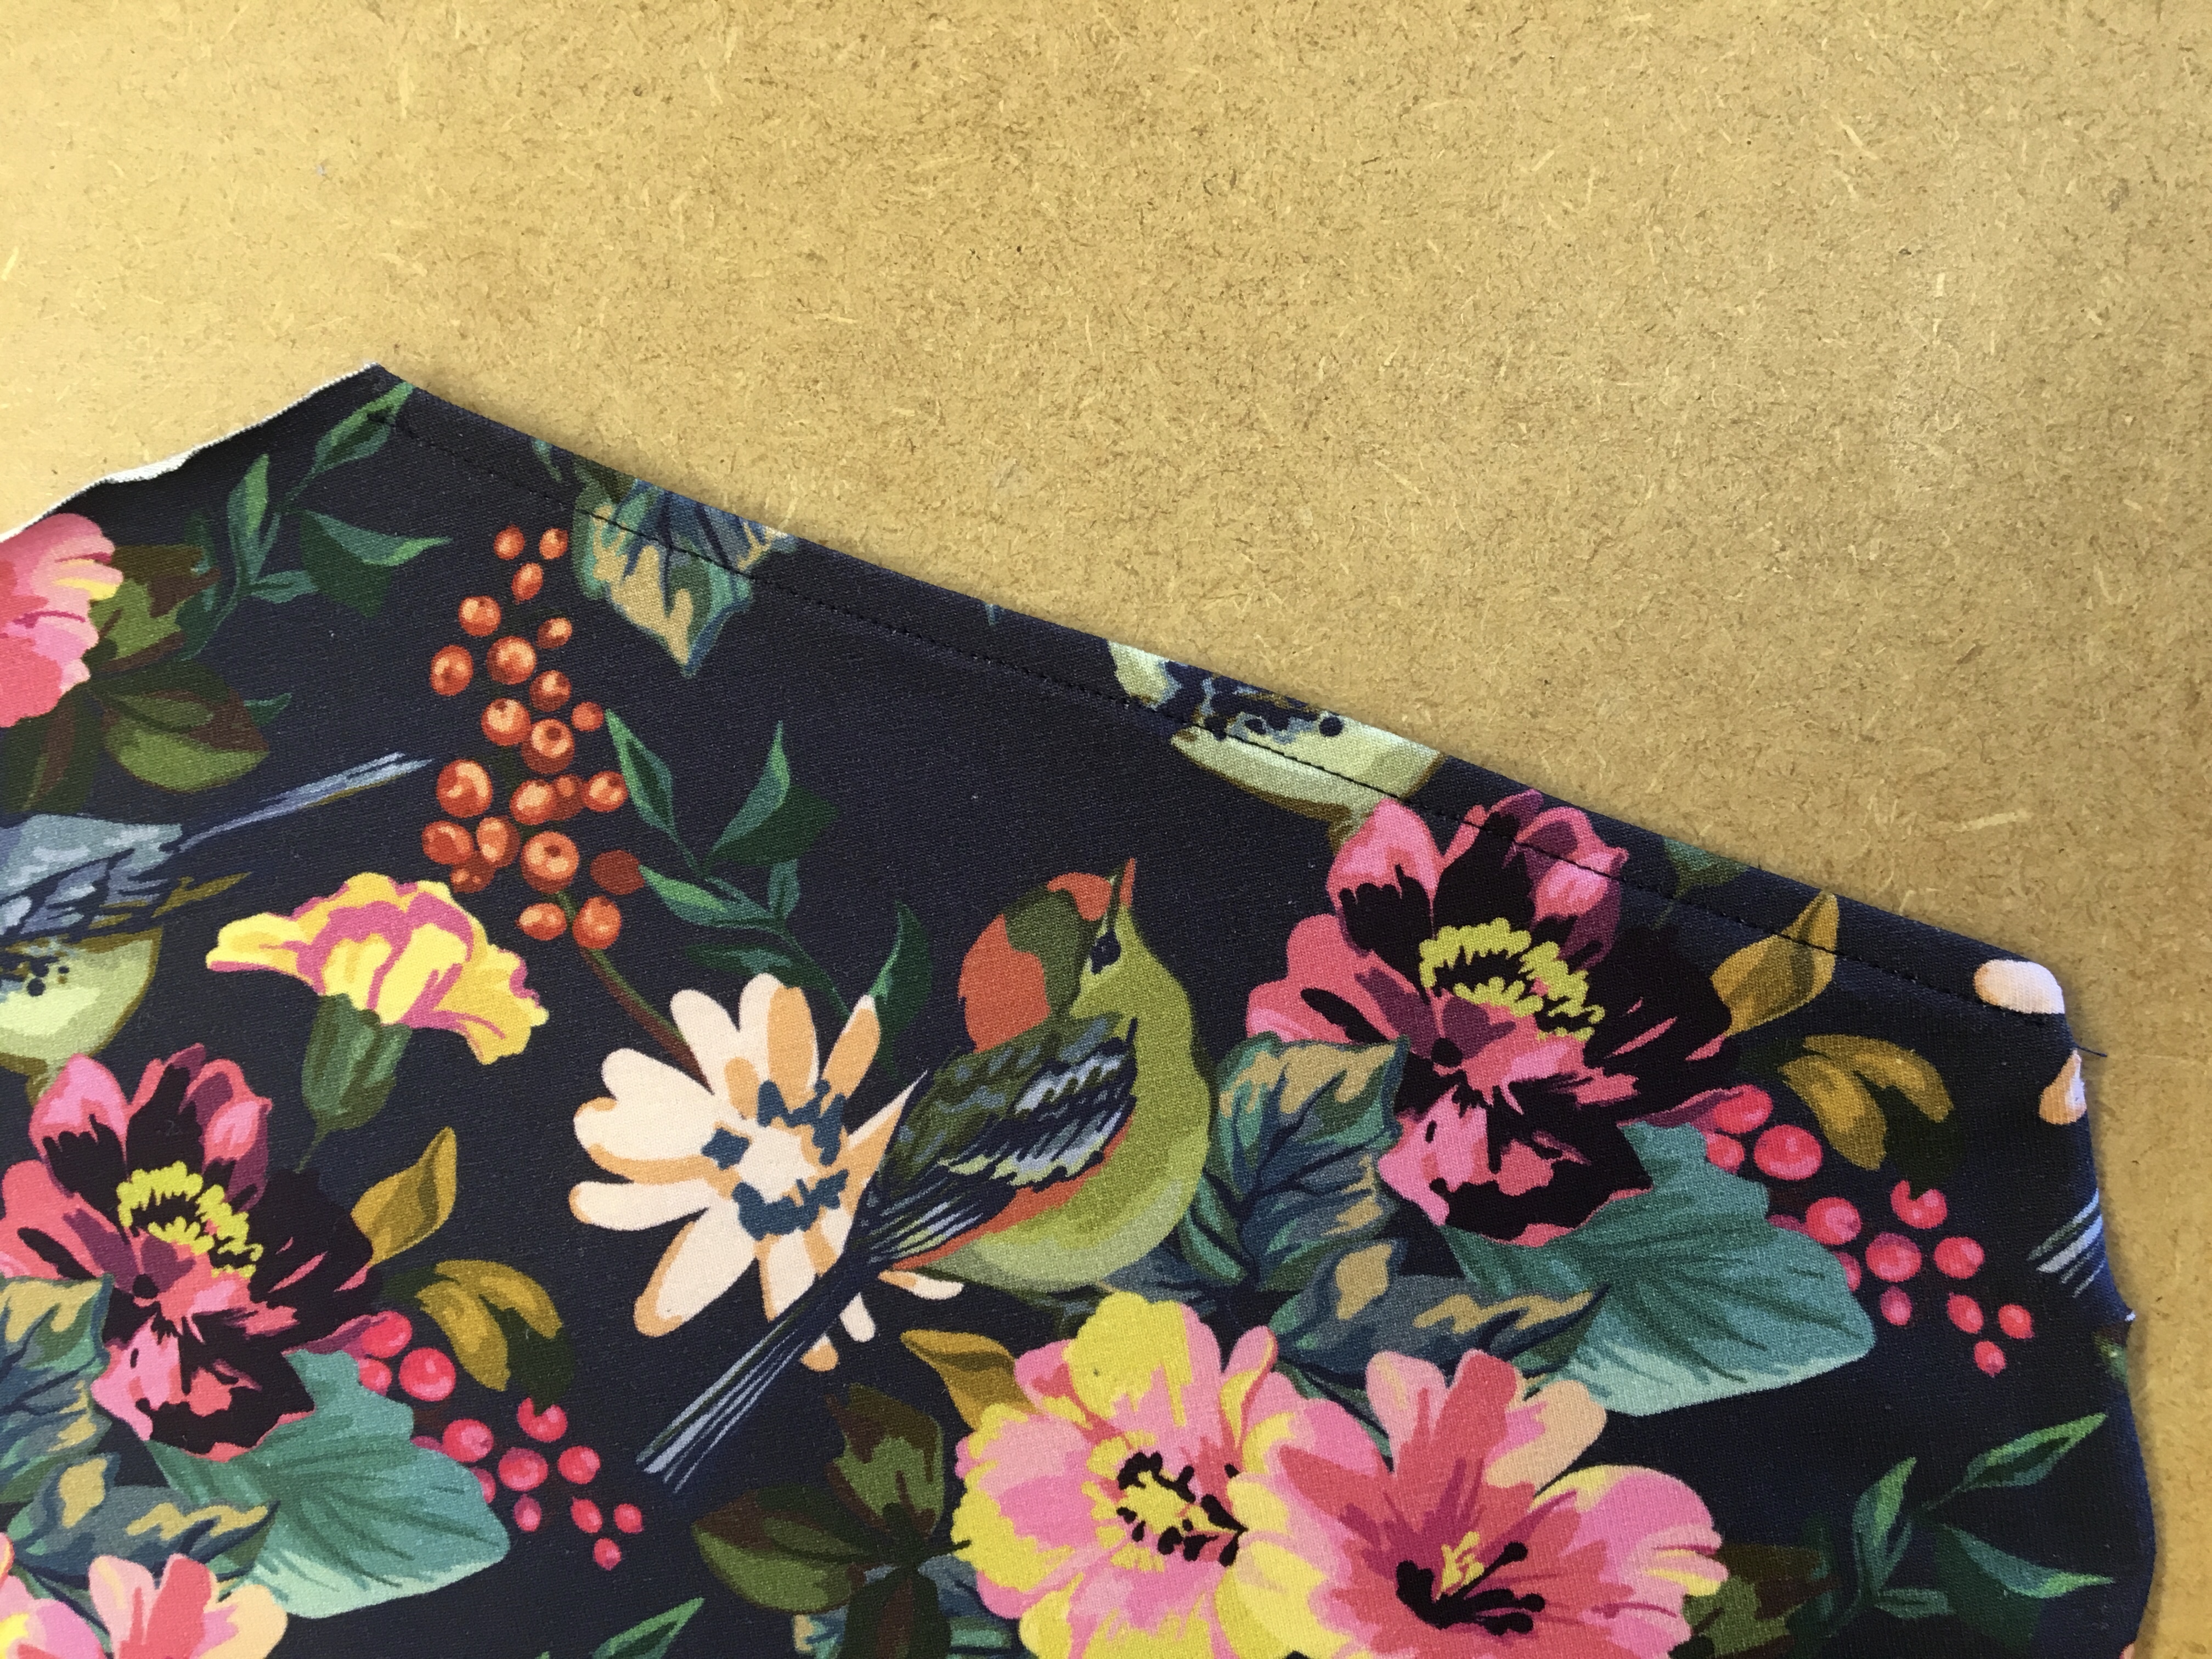
So since the release of the pattern Tilly has added a free download of a hip patch pocket (available through her website). I felt due to the light weight nature of the jersey fabric they were going to look a little strange so I decided to put in a standard trouser hip pocket.
In order to do this the first thing to do is to download Tillys pattern. Fold the printed front pocket pattern in half, so that the 2 angled sections are lined up. This is now what the pocket would look like if it were to be sewn on, so this is what we will use as our guide. Place the pocket pattern on top of the trouser front pattern (as it would be laid out if you were to patch it onto them) and draw in the pocket opening angle to the front leg pattern piece.

Take a separate piece of paper (I’ve used dot&cross pattern paper here but any paper big enough will do) and trace off the outline of the top of the front leg piece (You only need to trace off the section where the patch pocket sits).
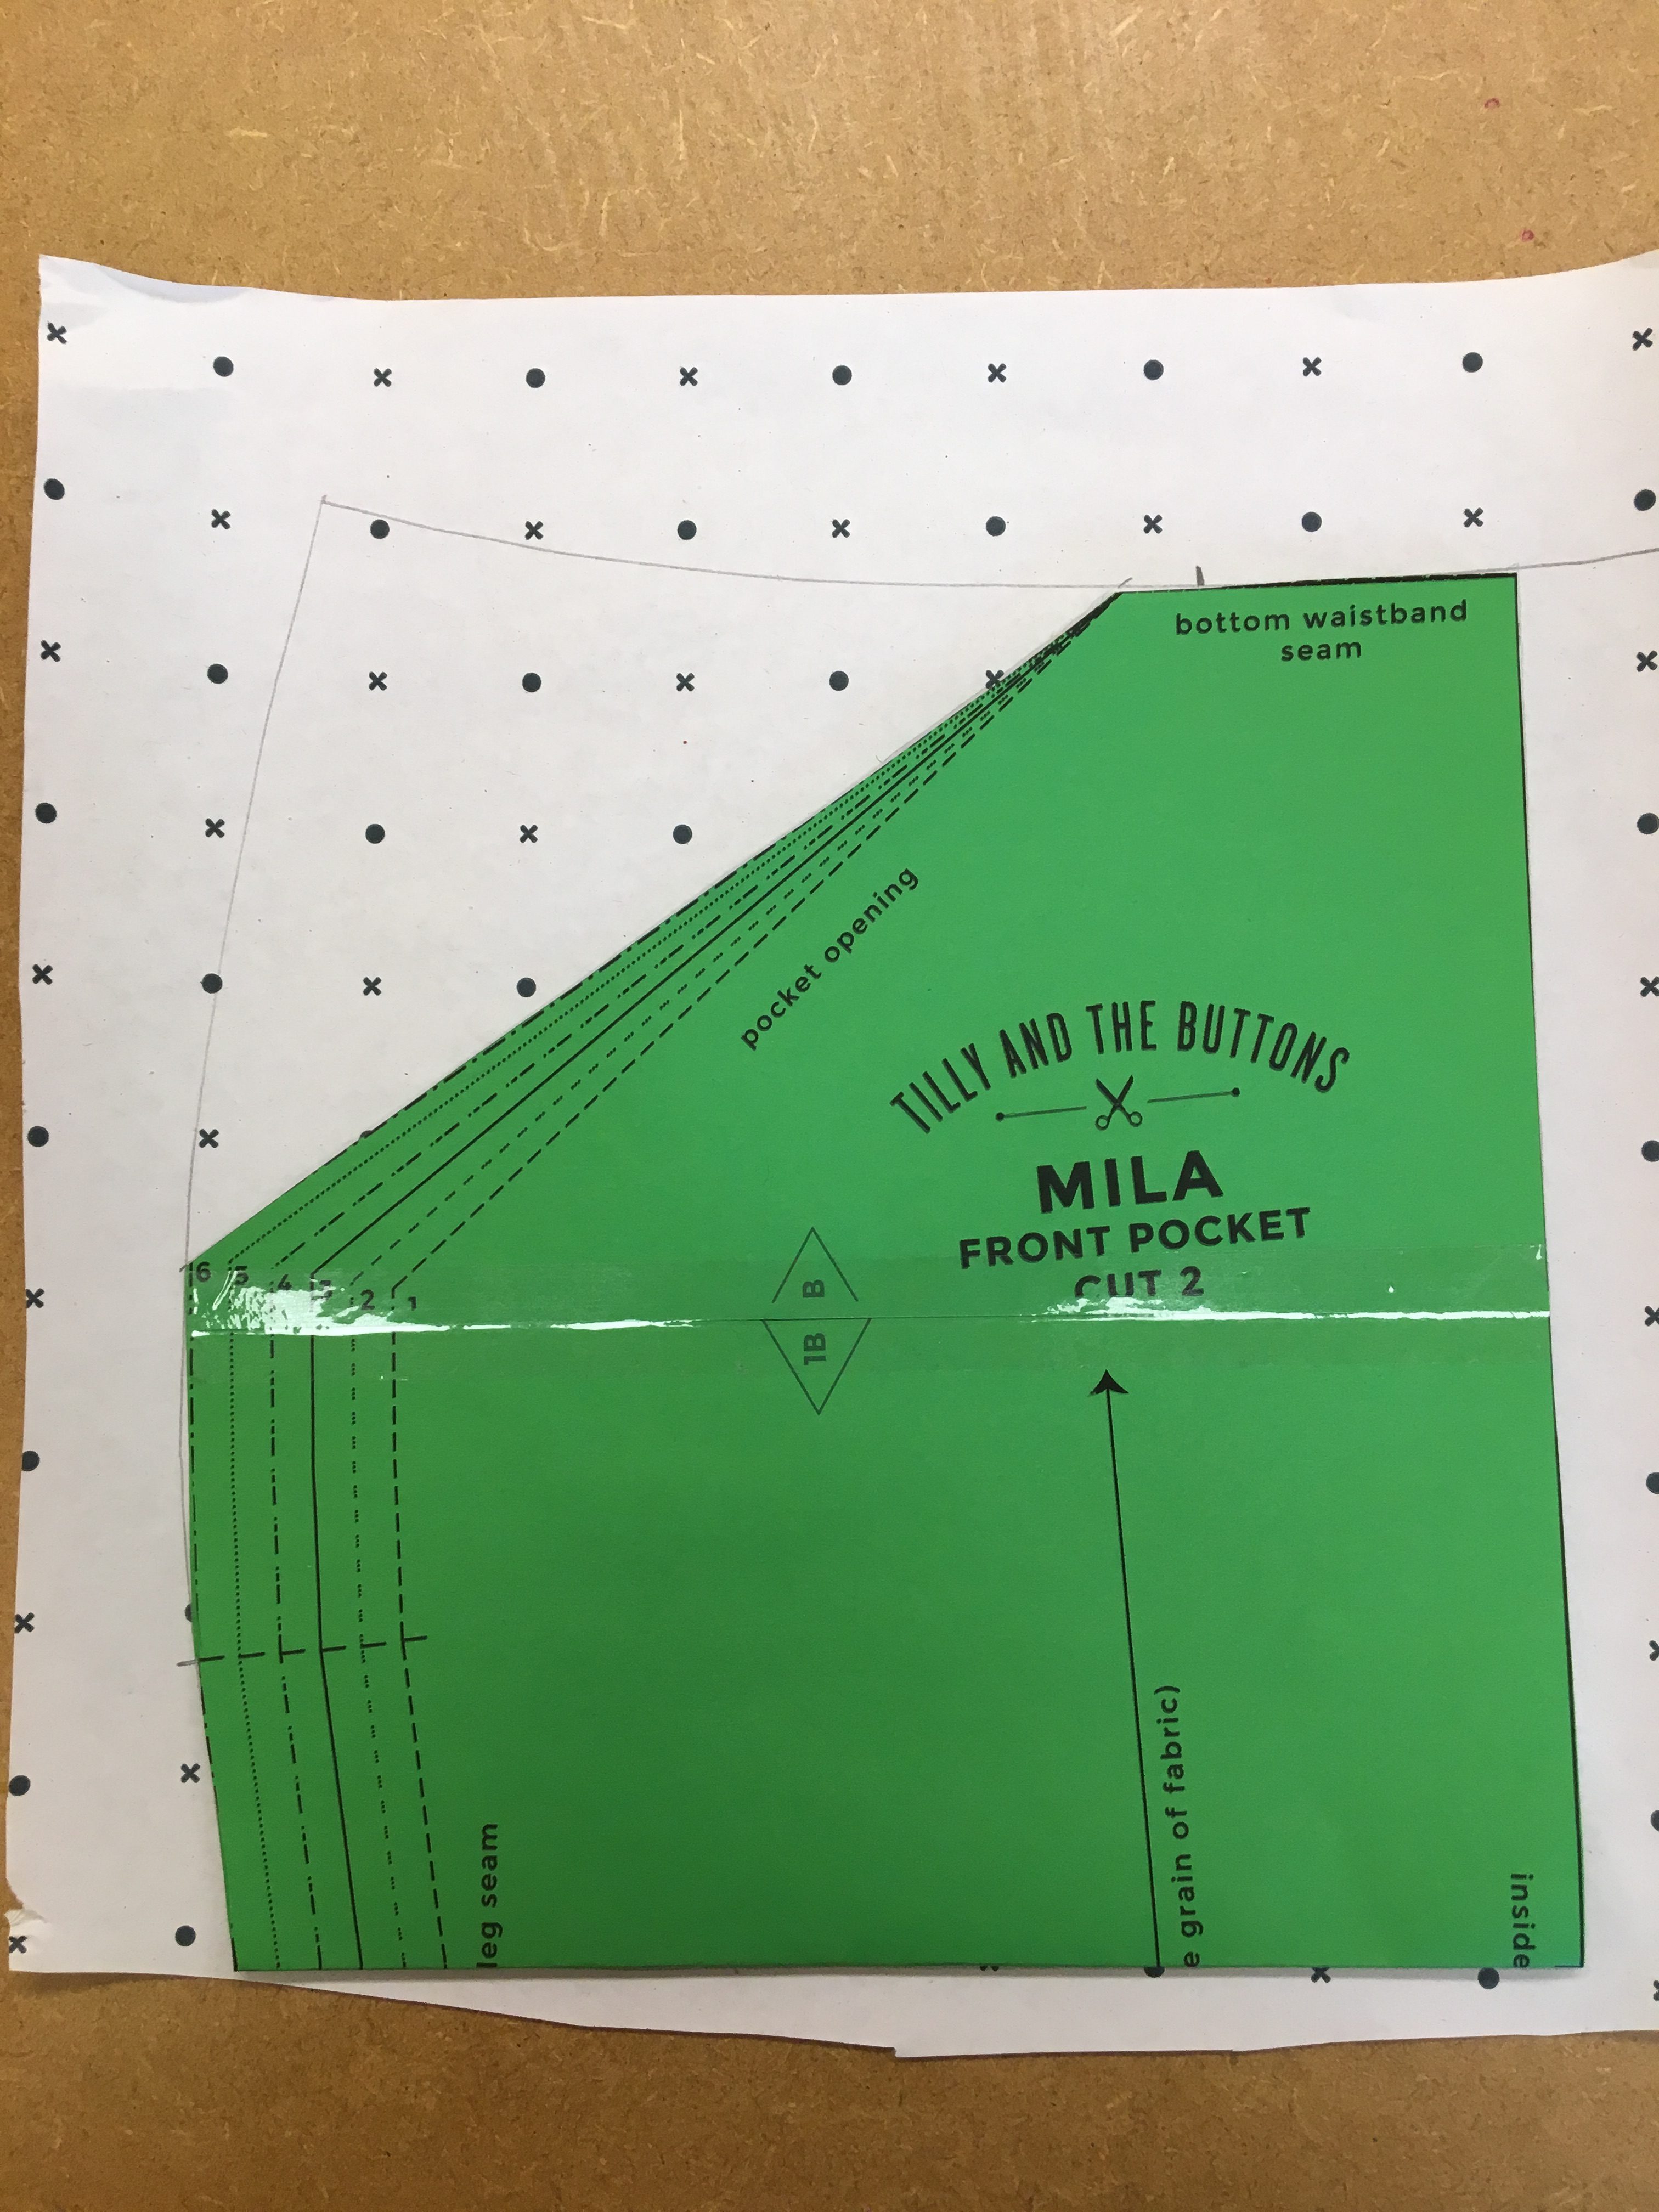
Draw on the angled opening again and then draw around the edge of the front pocket. I then curve off the corner so that it will sit better inside the garment. Cut this out, and then cut out an identical piece in another piece of paper. Now on one of those pieces cut off the top corner where you have drawn the angled opening. What you are creating is the patterns for the pocket bag that will sit behind the front trouser.
Where you have drawn the angled opening on the front leg pattern fold the paper behind. (You could cut it off if you wanted but i try to avoid this as it limits me in the future to not being able to make them without the adaptation).
You should now have 3 pieces that look like this…

When cutting out your fabric you will need to cut 2 front legs as stated on the pattern but also 2 of each of the pocket bag pieces.
When making up the garment you should sew this pocket together before you do anything else. First take the angled pocket bag and place it right sides together on the front leg and sew across the angled opening at the standard 1.5cm seam allowance.

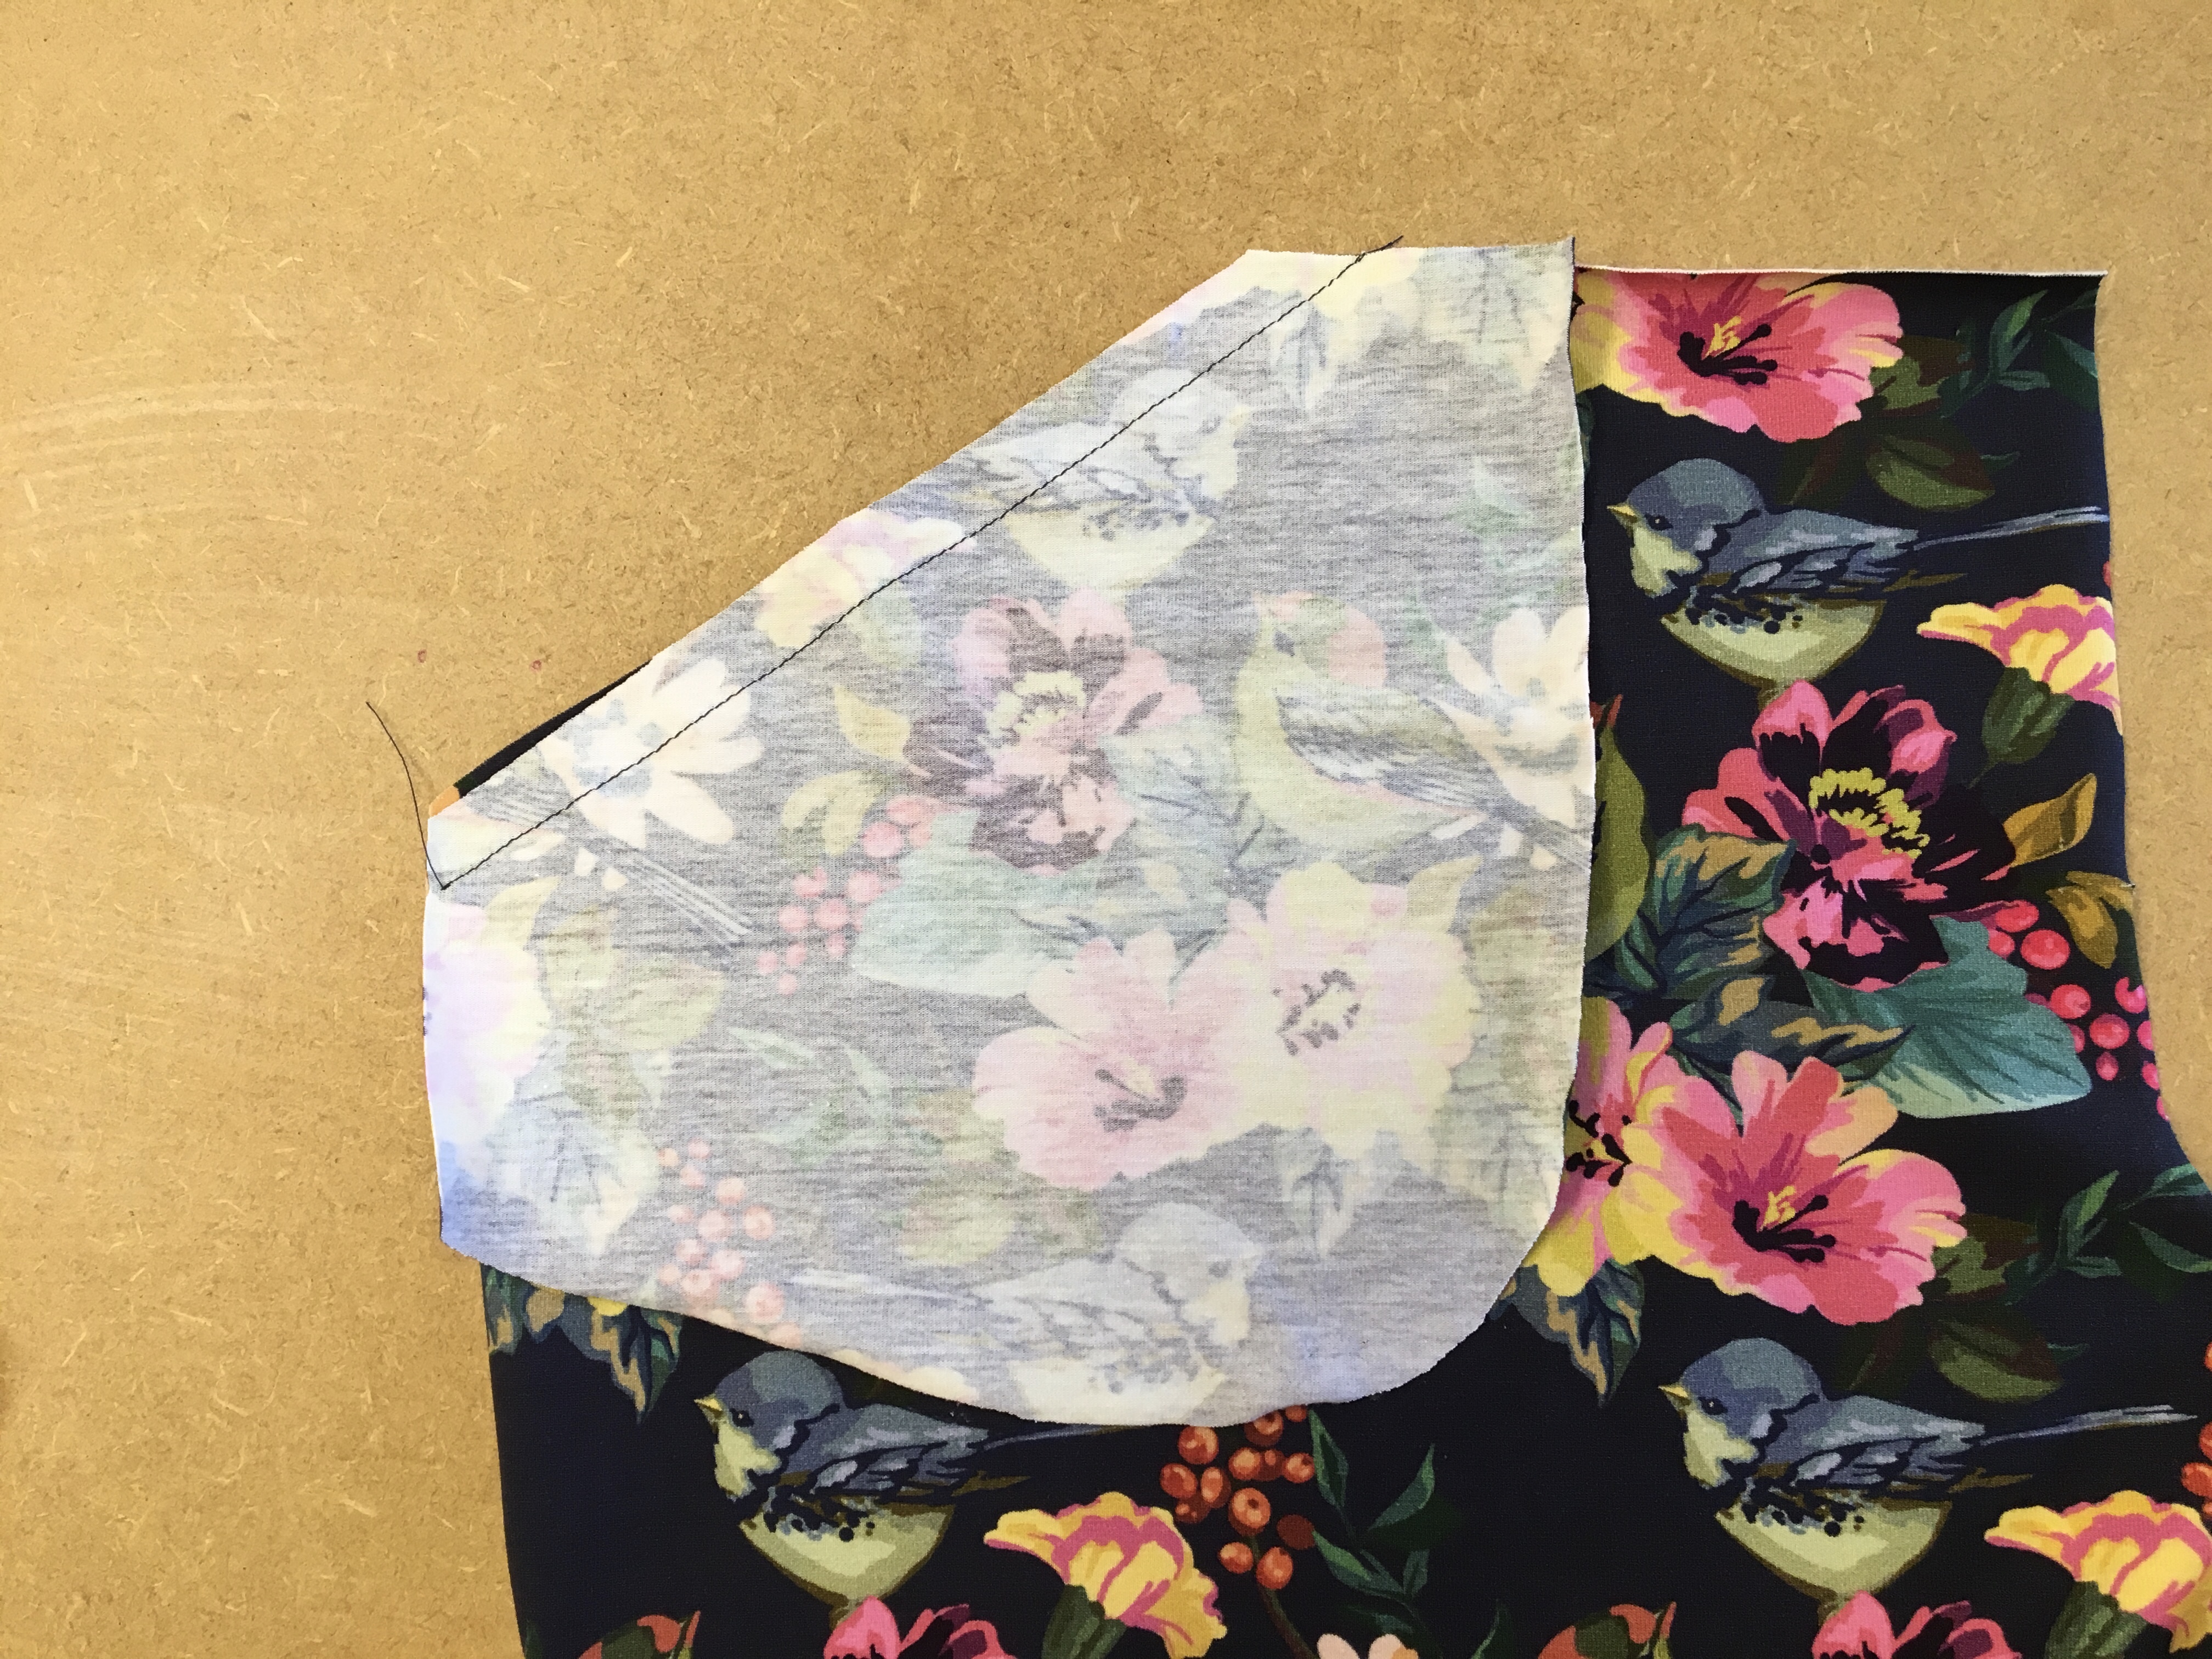
Turn the pocket bag to the inside and press well. I topstitched it in place to ensure the pocket stays on the inside of the garment when worn.
Turn the piece over so the wrong side is facing up and place the other pocket bag right sides together on top of the pocket bag you have already attached to your front leg. Pin and sew around the curved edge. (I also overlocked this edge but any finishing technique can be used here).

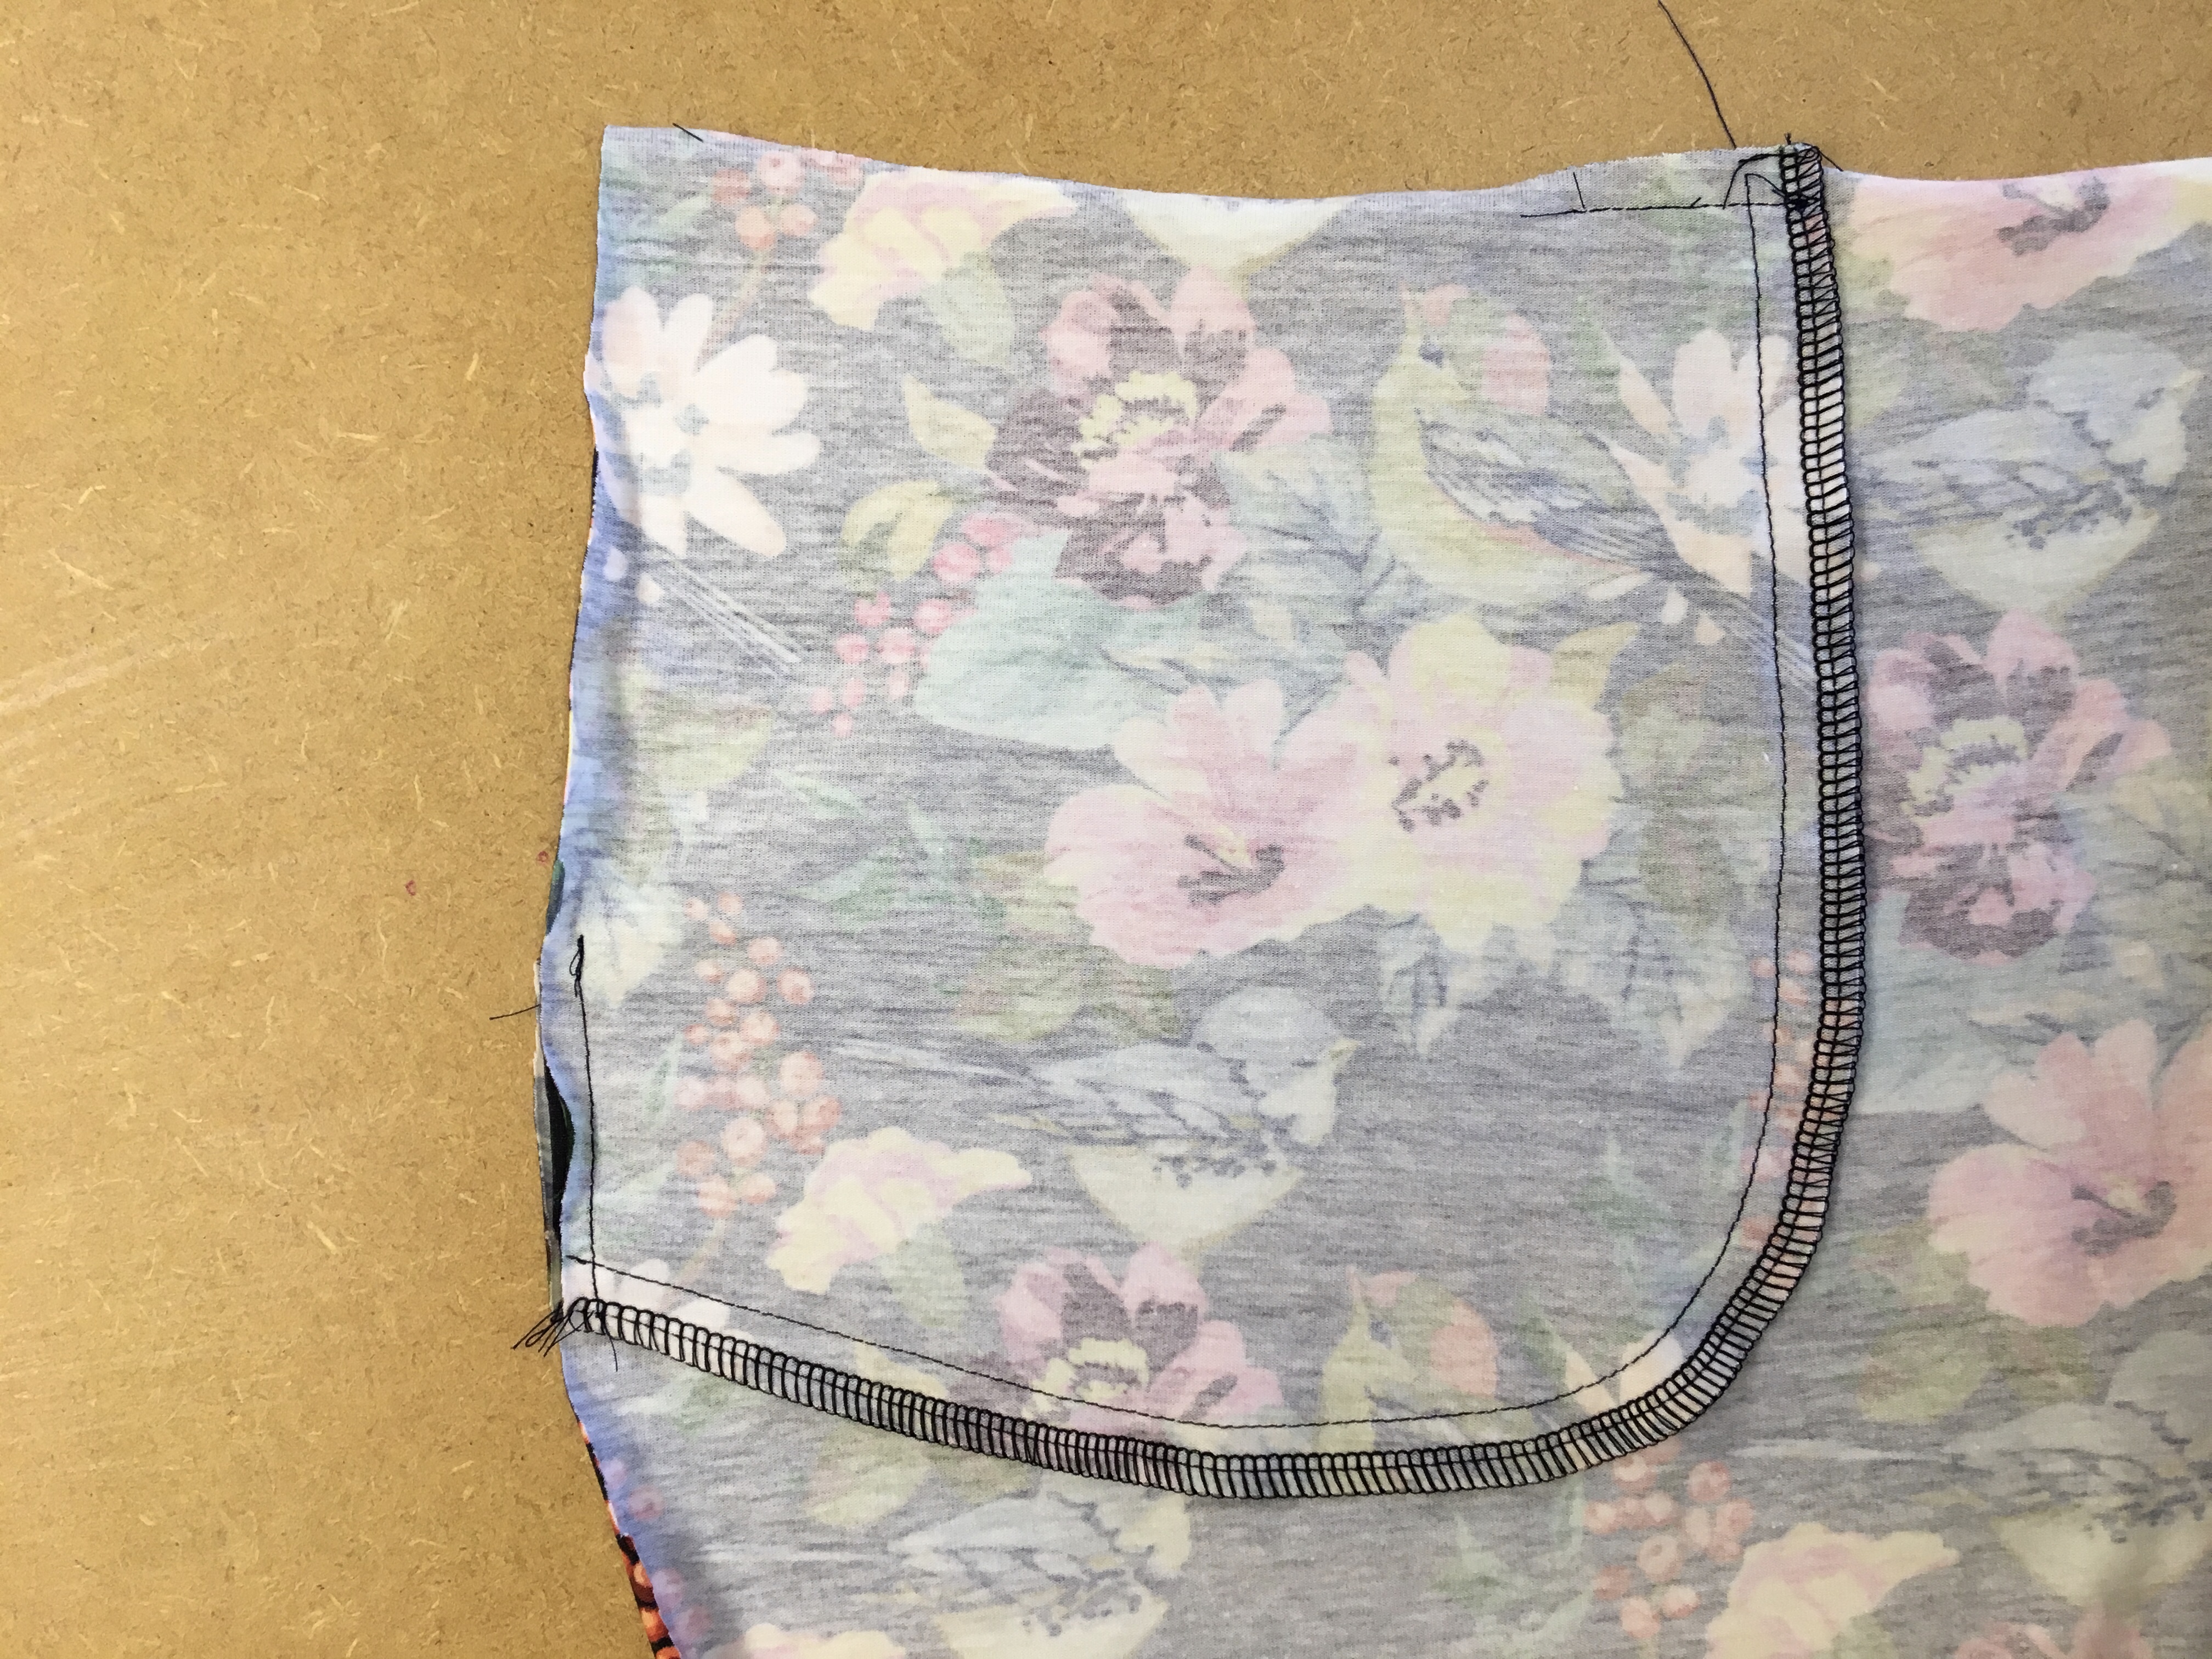
If you look closely you will see that I have then basted the pocket in place along the top and side edge. This just makes sure the pocket is sitting correctly when you sew the rest of the garment together. Now just repeat this process on the other leg and your two hip pockets are completed and you can now follow the instructions as per the pattern.
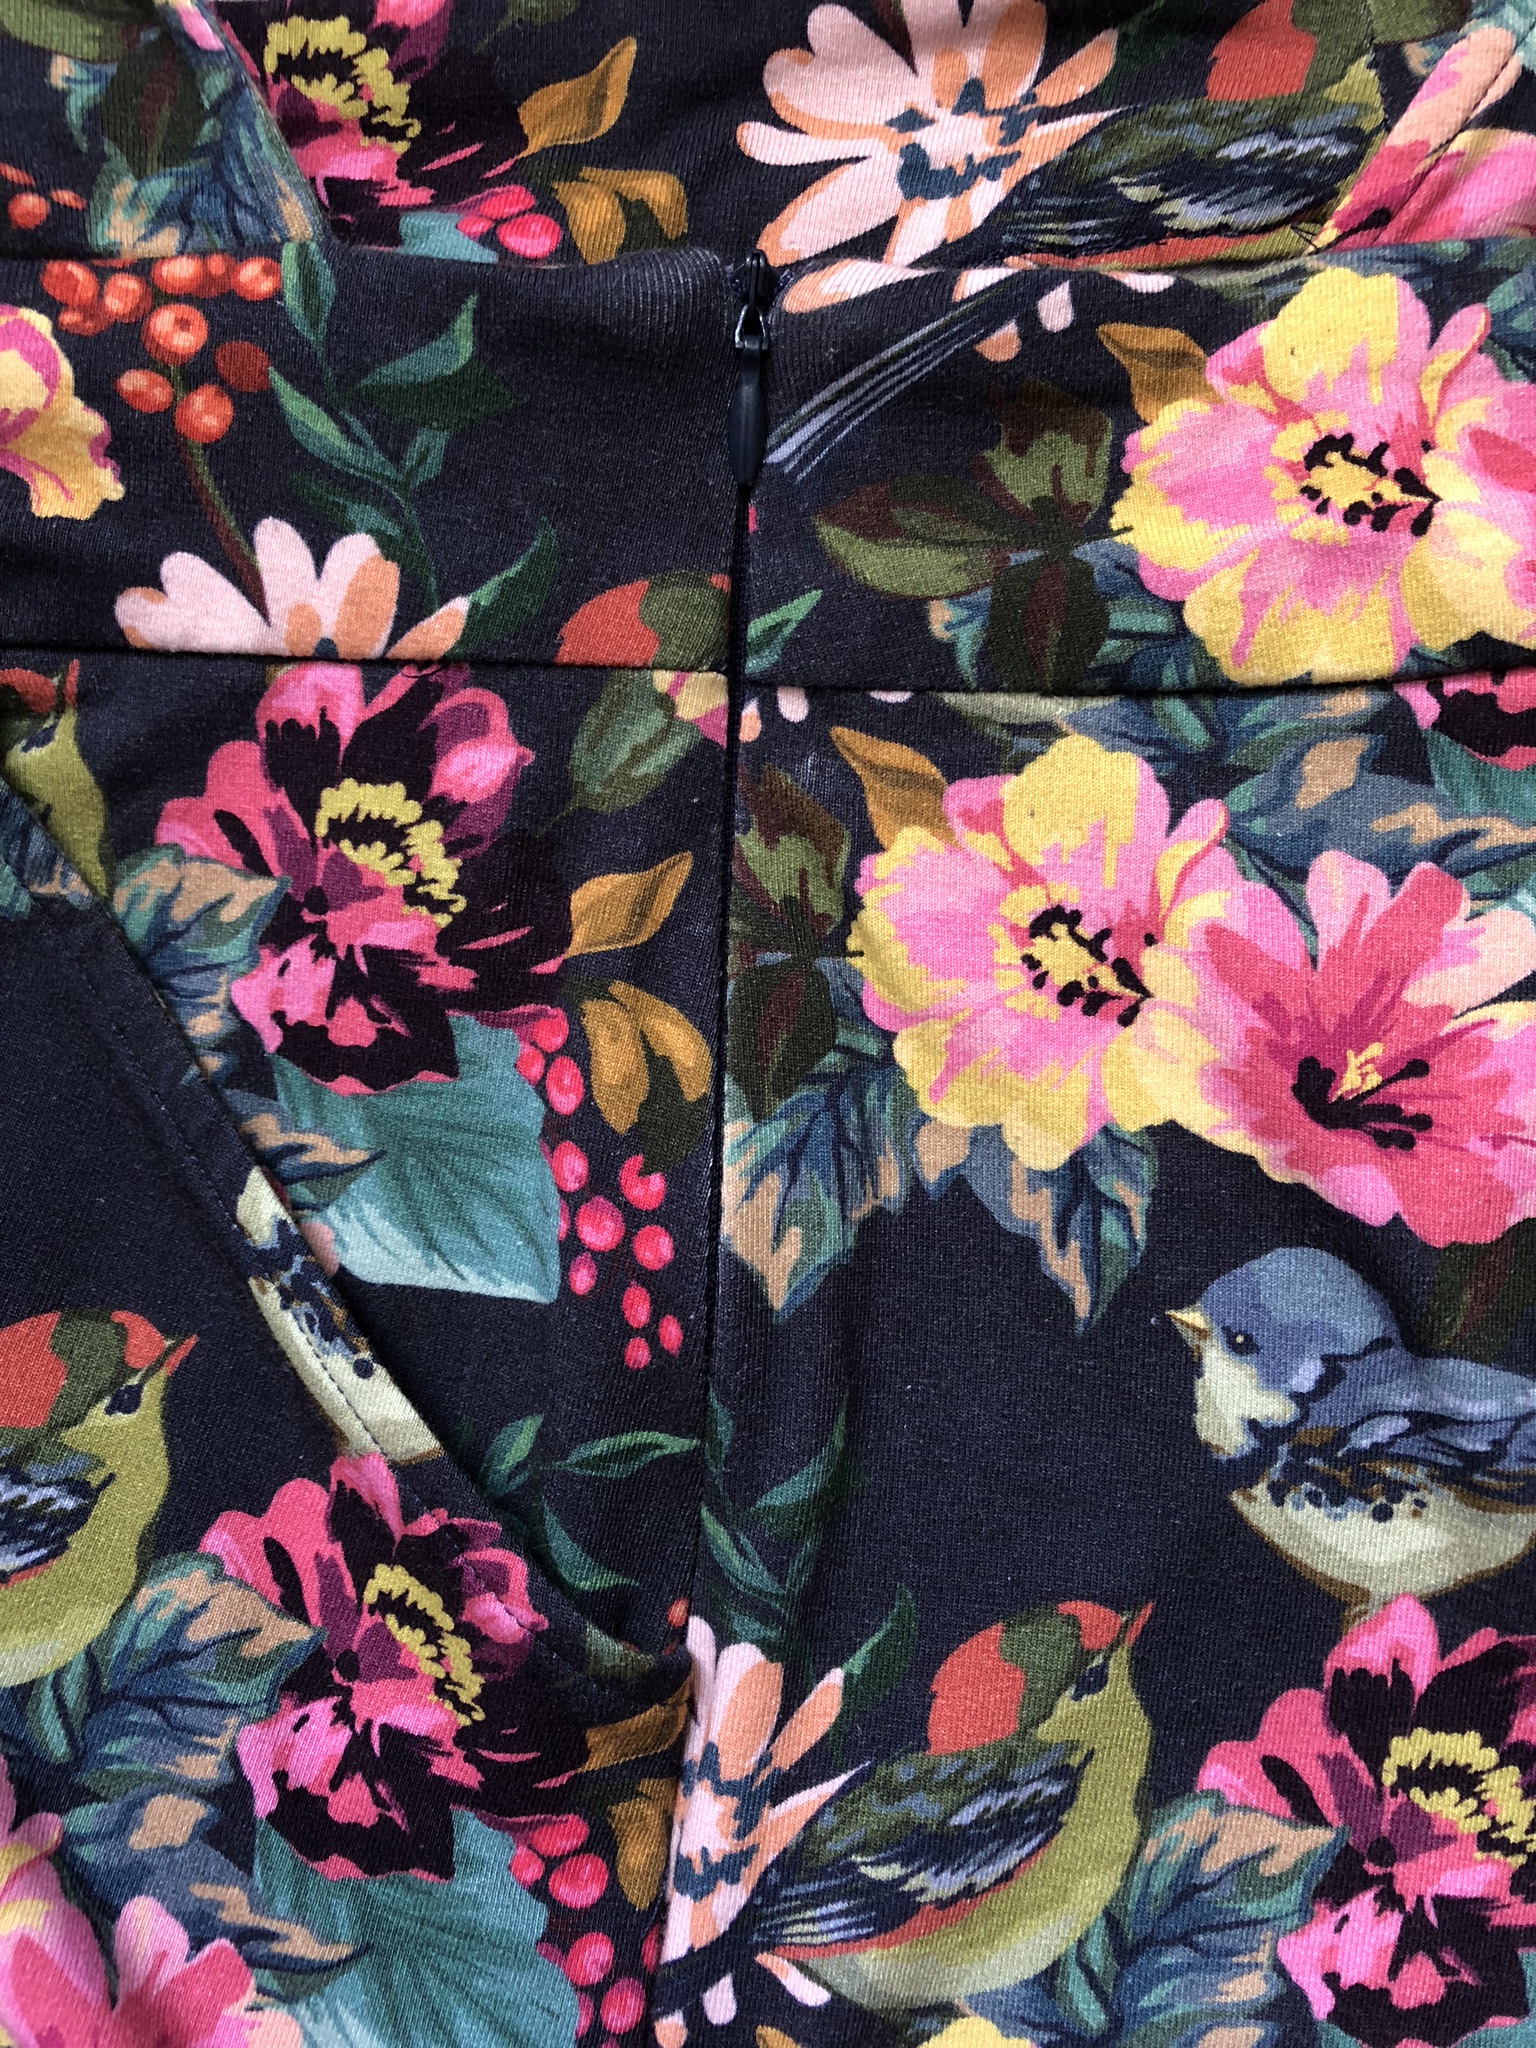
The buttons look really cute on a denim finish but I wasn’t sure they’d look quite right on this floral jersey. I also have a large bottom (its fabulous but it is large) that really doesn’t need any extra accentuation that I thought the buttons may bring. Putting a zip into jersey is never the simplest of tasks but with a little care taken not to stretch the fabric out as its sewing I didn’t experience any problems.
I would suggest that before you insert the zip you check the fit on the waist to avoid having to put the zip in and out multiple times (See above section about this).
The zip is there instead of the button tabs so when you get to this part of the instructions ignore them. The zip can’t be inserted until you have attached the waistband. When sewing up leave the left side leg open but sew together the front and back waistband at the right hand edge and then attach to the legs as one piece. Then insert the zip into the side just as you would on a skirt, being careful to make sure that when the zip is closed the bottom of the waistband lines up on each side.
Zips are traditionally inserted on the left side of a garment (if its a side zip) so you can use your right hand to open and close the zip. Of course if you’re left handed and fed up of right handed clothes you could just insert it on the other side.
I used a 12″ zip and found this plenty long enough for getting in and out of the dungarees easily.
I decided to use eyelets instead of dungaree clips for 2 reasons. The first of these being that I was unsure how well the fabric would take the weight of the clips because of how light weight it was. The second was that I wanted to wear the dungarees as evening wear and felt that it would look more jumpsuit like with a tie finish.
The only real preparation you have to do is cut the straps longer. I cut them 6″ longer than the pattern to give myself a longer tie, which I think looks really effective hanging down.
I then hammered on a 22mm eyelet (which I inserted in the same spots the pattern suggests the dungaree buttons should be placed). And that’s it, super simple.

I am absolutely thrilled with the finished dungarees, they work so well in the jersey. I’ve worn them teamed with a pair of heals for the evening and a pair of flip flops for the daytime and they work for both occasions.
If there are any questions about any of the adaptations to the pattern please feel free to comment below or drop me a message.
This fabric is just so me isn’t it, but the fun here is its part of the print on demand service from Minerva.com so I
The Style Arc Hope Dress is super versatile with the extension pattern, and this time I’ve changed the skirt entirely putting on a tiered gathered
The biggest issue I have with the changes to what I understand to be a very British tradition of Christmas crackers in order to make
As we begin the run-up to Christmas I thought I’d share a few ideas of things you could make for gifts. I mean this one
I have been pattern cutting for nearly 2 decades, and it’s something I take a huge amount of joy in… helping people have clothing to
2 responses
Could this pattern be used to make a pair of slim trousers, ie made up without the bib? Would this work do you think? Thanks for your help.
In theory yes, but without fitting really accurately at the waistband I don’t know how well they would stay up.